How I Built Flight Sharing and Screenshot Protection for 12Bay on iOS
Table of Contents
Abstract
When you plan a trip with family or friends, choosing a flight is rarely a solo decision. You search for cheap tickets, compare airlines, check departure hours, and then try to show the options to everyone in your group.
For a long time, the common habit was simple: take five or six phone screenshots and send them into a group chat. But screenshots are messy, hard to read, and quickly go out of date as airline prices change.
To solve this for 12Bay, I built a one-tap flight sharing feature that generates a clean link with full trip details. Along the way, I also added a smart screenshot protection mechanism on iOS using UITextField and system-level security layers.
In this post, we will explore:
- Why sharing flight options needed a better user experience
- How we built the flight share link and data payload
- The iOS screenshot protection trick using
UITextFieldsecure layers - How we turn screenshot detection into a friendly sharing flow
Let’s get started.
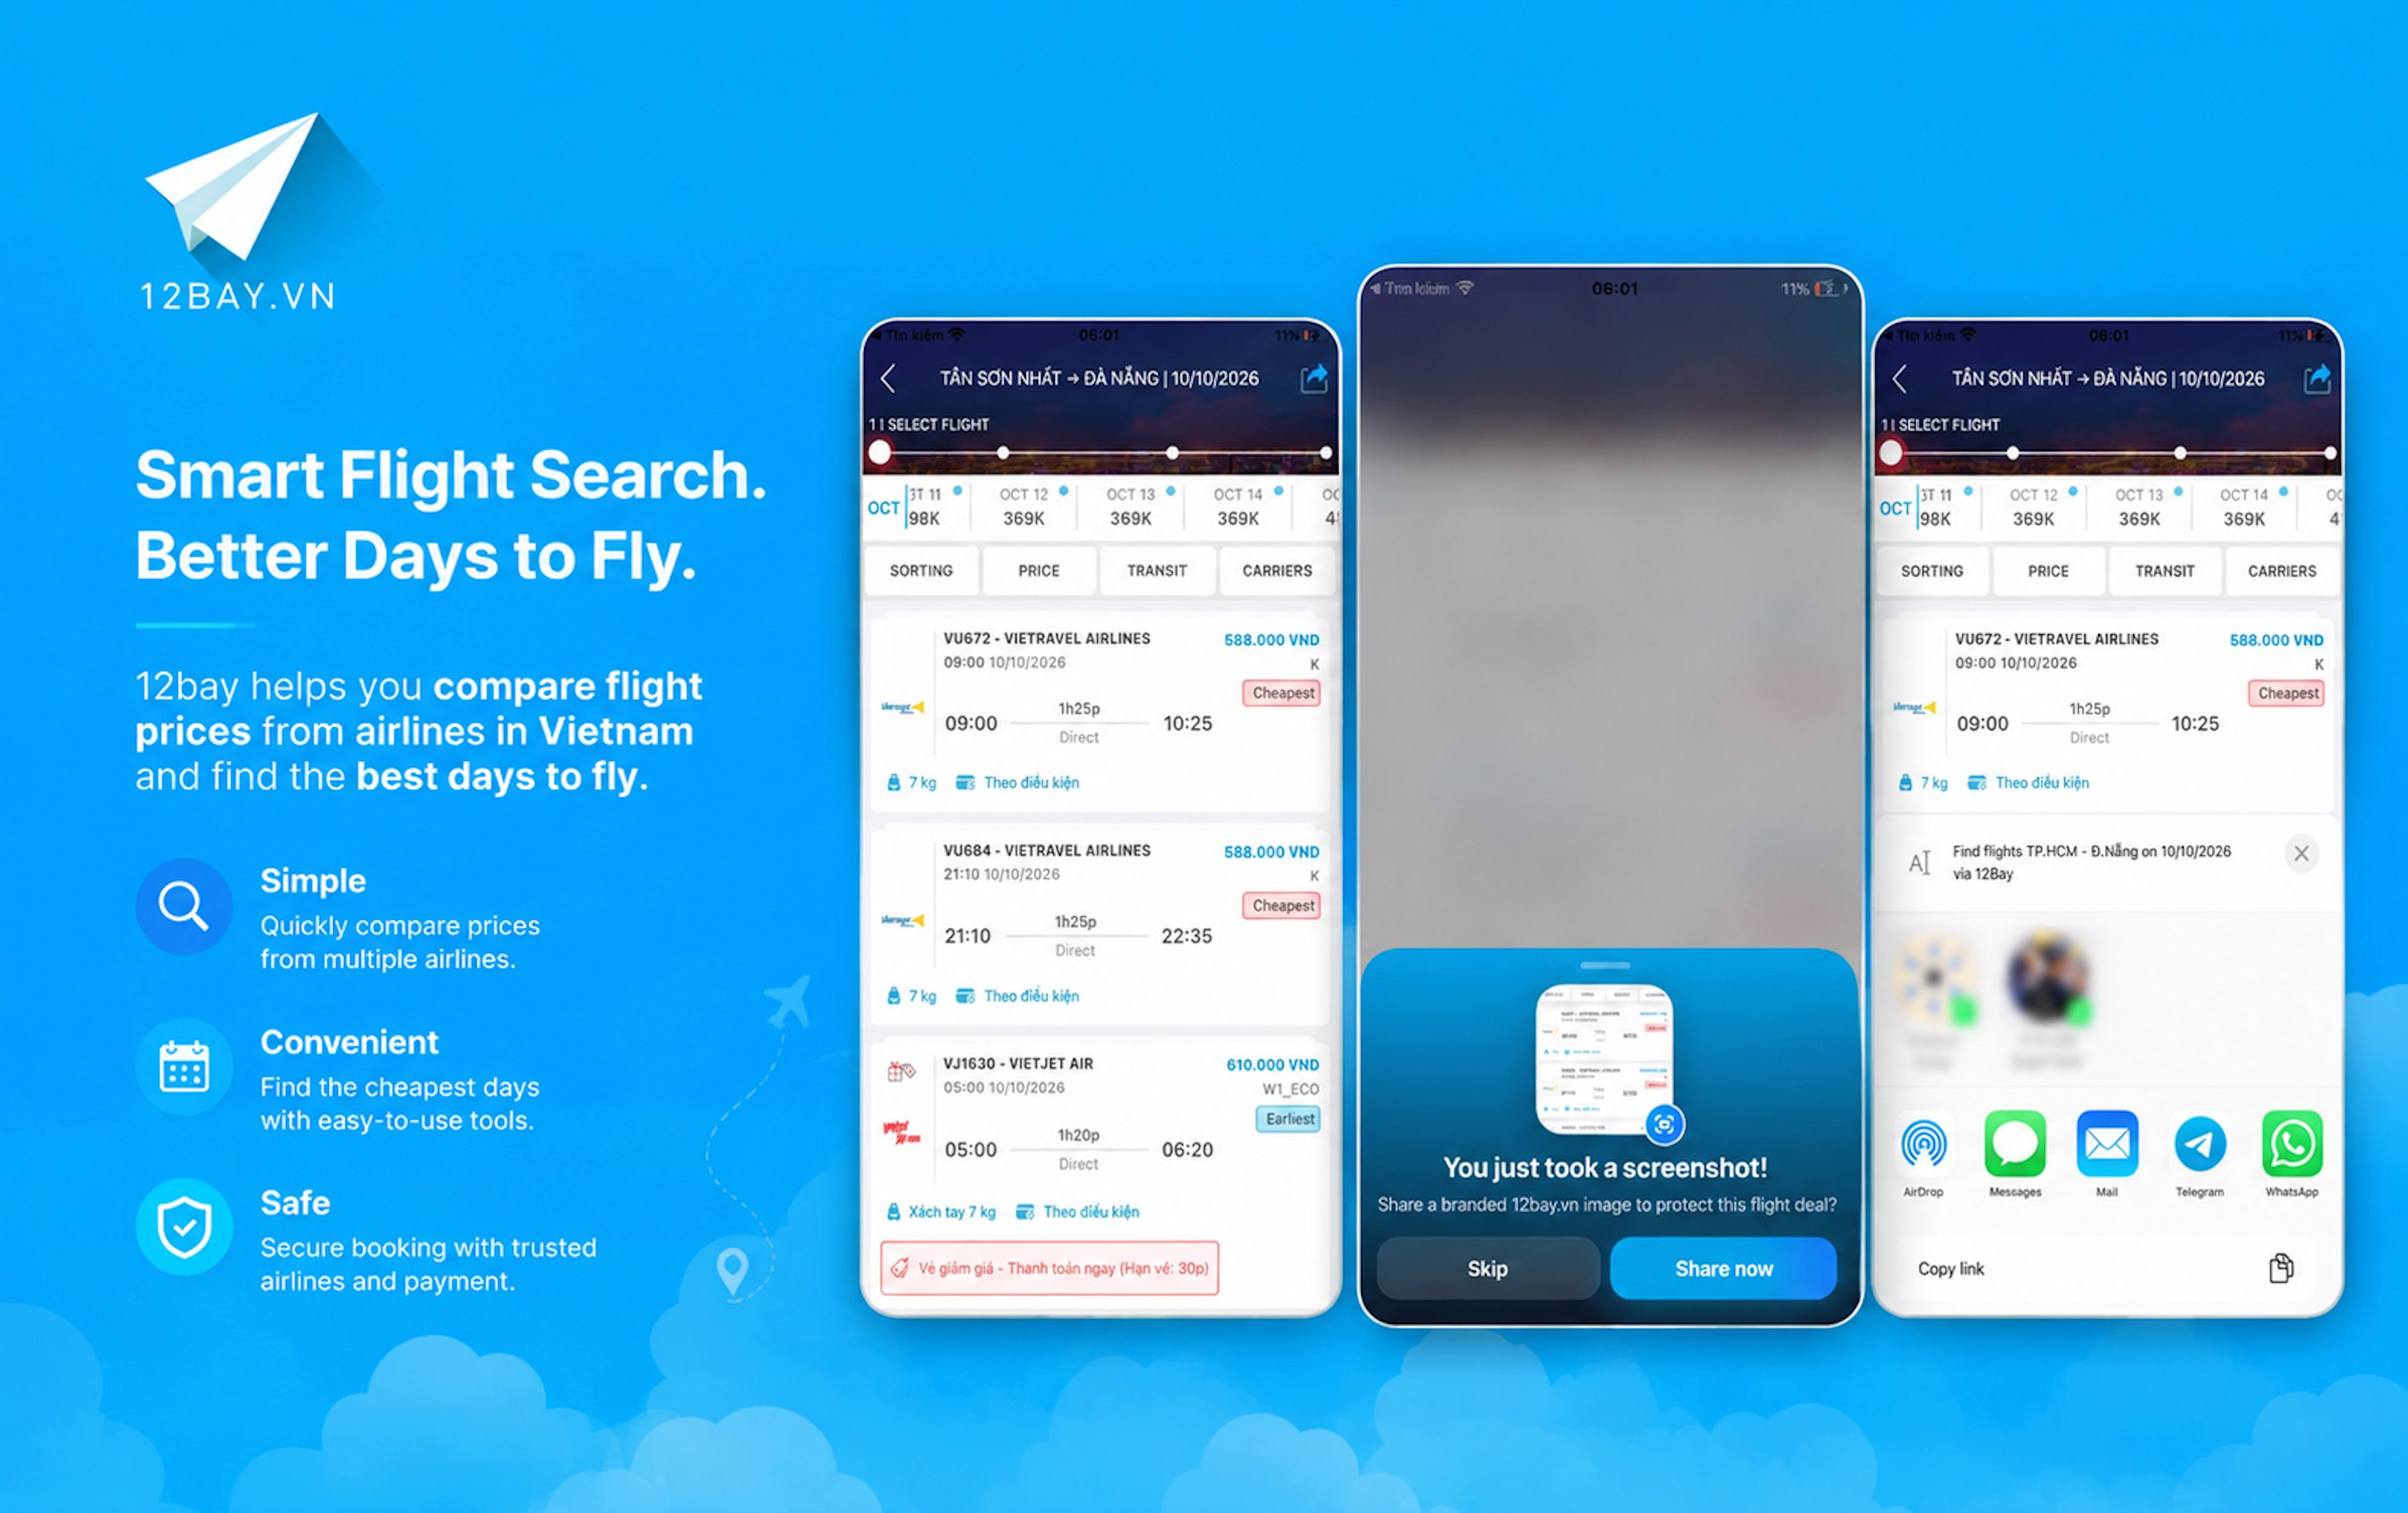
12Bay flight search results, screenshot detection sheet, and share actions
The problem: messy screenshots and lost details
When users search for flights on 12Bay, they often compare several carriers at once, such as Vietravel Airlines, Vietjet Air, or Vietnam Airlines.
Finding a good price for a route like Ho Chi Minh City (SGN) to Da Nang (DAD) takes only a few seconds. But sharing that flight deal with someone else used to create several headaches:
- Screenshot overload: Users had to capture multiple screens to show outbound times, prices, and luggage terms.
- No live updates: If a cheap fare sold out an hour later, the screenshot still showed the old price, causing confusion.
- Manual re-typing: The person receiving the screenshot had to open the app and type the route and date from scratch.
We needed a smoother workflow. The sender should tap one share button, and the receiver should open a single link that instantly displays the exact flight search: departure city, destination city, travel date, passenger count, and all available flights.
Designing the flight share flow
The core idea is straightforward: instead of sharing a static image, we share the active search state through a smart link.
The overall flow works in three simple steps:
- Package the search state: When a user views flight results, the app captures the current search criteria—such as the route, travel dates, and passenger count—and formats them into a clean, shareable URL.
- Native share integration: Tapping the share icon presents the standard iOS share sheet (
UIActivityViewControlleror SwiftUIShareLink). The message includes a concise description of the route alongside the link, making it look clean when shared across chat apps like Messages, Telegram, WhatsApp, or Zalo. - Seamless state restoration: When the recipient opens the link, iOS routes it via Universal Links directly into the app (or falls back to the mobile web). The app parses the incoming link, immediately restores the search criteria, and fetches the latest live fares from all airlines.
This flow eliminates manual typing for the receiver and ensures that everyone in the group always sees accurate, real-time ticket availability.
Protecting sensitive screens: the UITextField trick on iOS
While working on flight sharing and booking details, we also looked closely at screen security.
In travel and e-commerce apps, some screens contain personal identity data, booking codes, or promotional voucher codes. Users often take screenshots without realizing that third-party photo libraries or background recorders might read that sensitive information.
On iOS, Apple provides standard APIs to detect when a screenshot happens, but does not provide a direct view.isScreenshotAllowed = false property.
However, iOS has a built-in security mechanism inside UITextField when isSecureTextEntry is enabled. We can use this mechanism to create a secure container view that protects any custom view hierarchy.
Demo: screenshot and recording protection
Before looking at the implementation, let’s see how the protection behaves in practice:
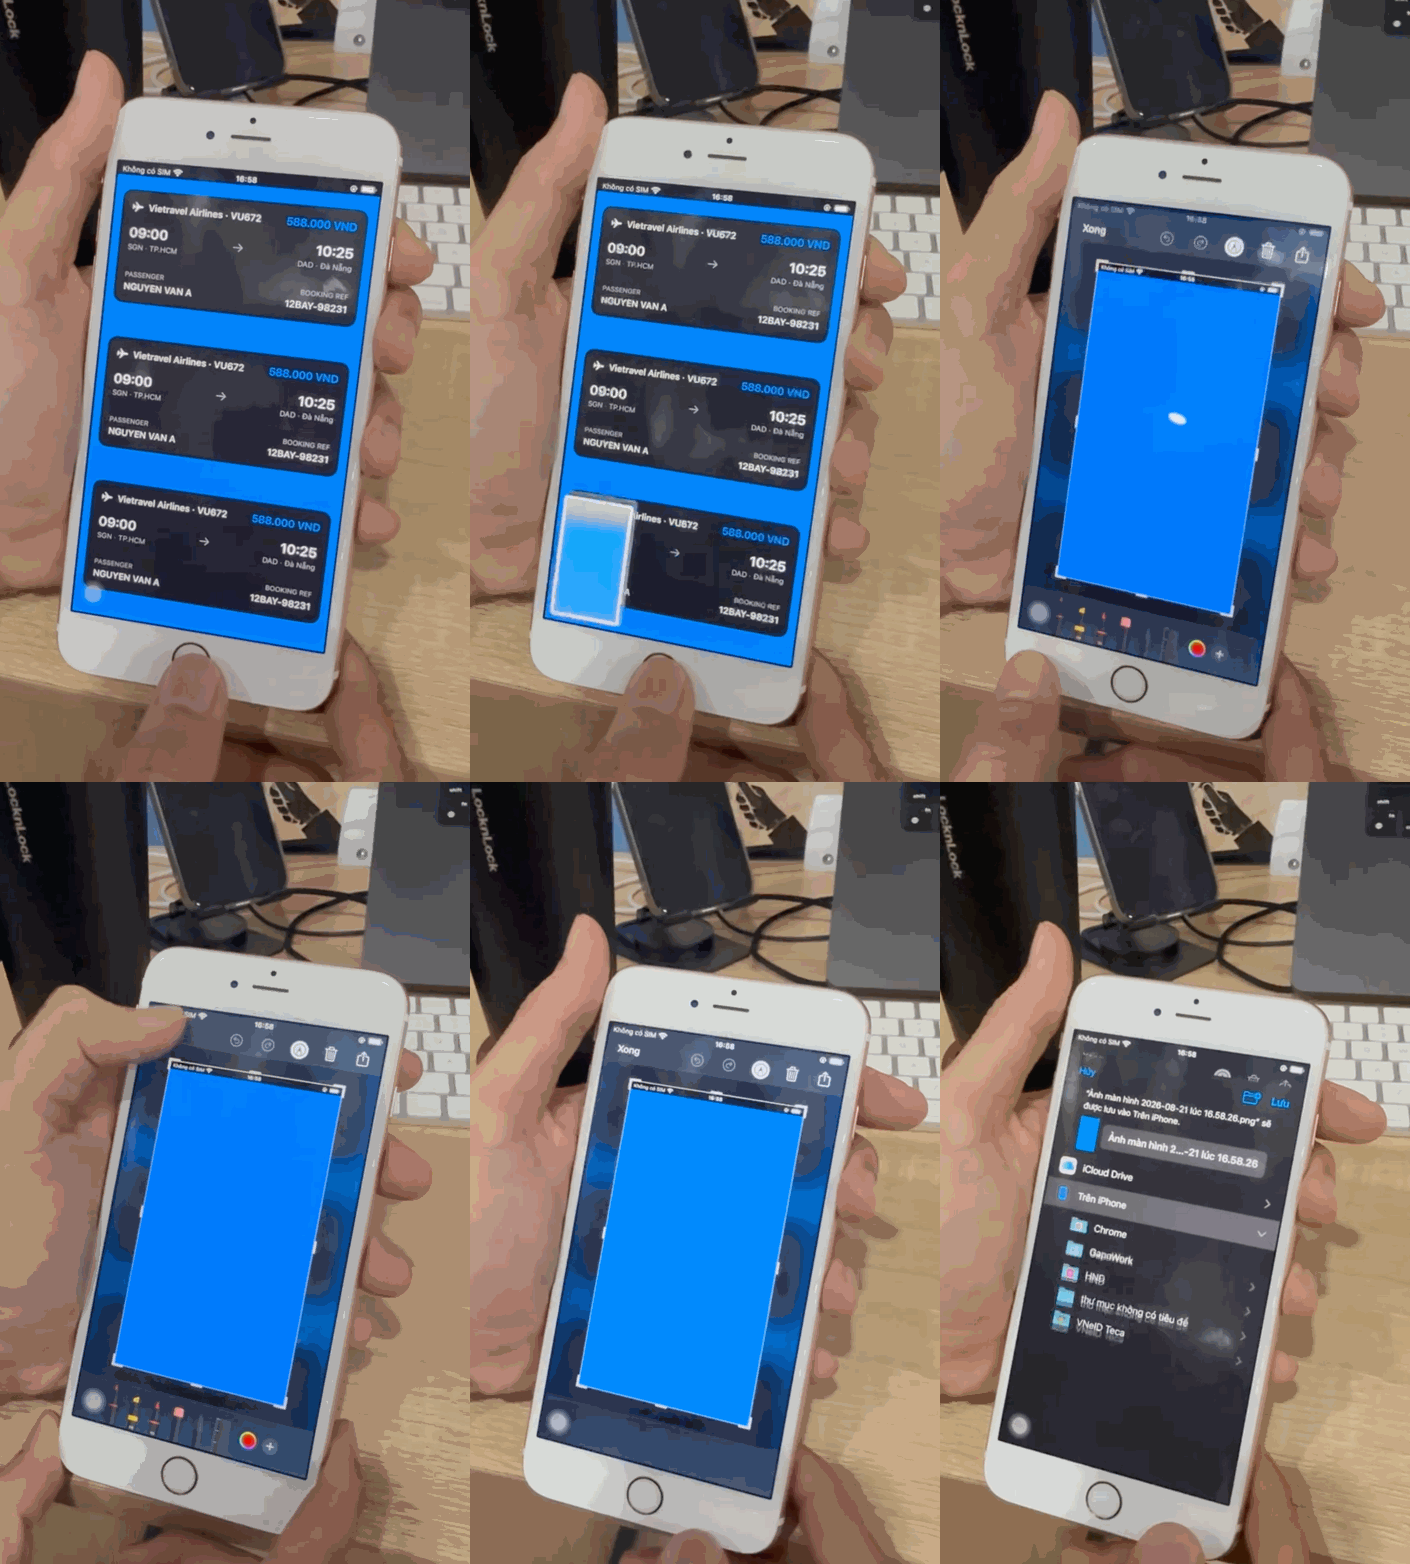
Protected view vanishes instantly from the snapshot and prompts a safe share link.
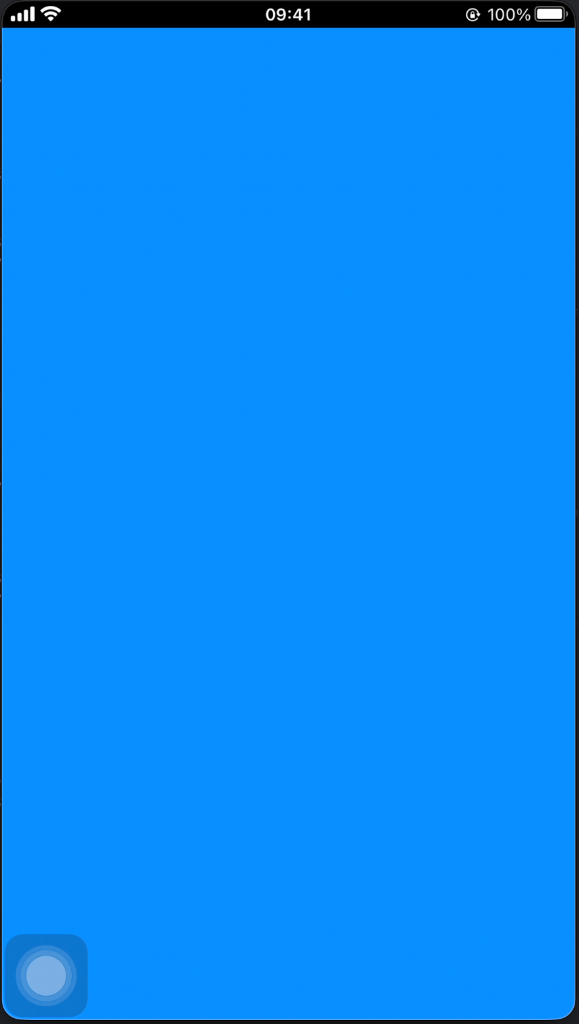
iOS system compositor renders the protected canvas completely blank throughout recording.
How the secure layer works
When you enable isSecureTextEntry = true on a UITextField:
- iOS creates an internal container view (a private canvas layer) to render password text.
- The operating system places this layer onto a protected display surface.
- When the iOS compositor (the system Render Server) takes a screenshot or records the screen, it automatically skips this protected layer.
- On the captured image or video, the area inside the container appears blank, hidden, or blacked out, while remaining fully visible to the user holding the device.
By embedding our custom subviews inside the internal canvas of a hidden secure text field, our views inherit the exact same protection.
Implementing SecureContainerView in UIKit
Here is a practical, production-ready implementation in Swift:
import UIKit

/// A container view that protects its embedded content from iOS screenshots and screen recordings.
final class SecureContainerView: UIView {
    private let secureTextField = UITextField()

    var contentView: UIView? {
        didSet {
            oldValue?.removeFromSuperview()
            guard let contentView = contentView, let canvasView = secureCanvasView else { return }

            canvasView.addSubview(contentView)
            contentView.translatesAutoresizingMaskIntoConstraints = false
            NSLayoutConstraint.activate([
                contentView.topAnchor.constraint(equalTo: canvasView.topAnchor),
                contentView.leadingAnchor.constraint(equalTo: canvasView.leadingAnchor),
                contentView.trailingAnchor.constraint(equalTo: canvasView.trailingAnchor),
                contentView.bottomAnchor.constraint(equalTo: canvasView.bottomAnchor)
            ])
        }
    }

    private var secureCanvasView: UIView? {
        // iOS embeds the protected rendering layer inside the text field's subviews
        return secureTextField.subviews.first
    }

    override init(frame: CGRect) {
        super.init(frame: frame)
        setupSecureContainer()
    }

    required init?(coder: NSCoder) {
        super.init(coder: coder)
        setupSecureContainer()
    }

    private func setupSecureContainer() {
        secureTextField.isSecureTextEntry = true
        secureTextField.translatesAutoresizingMaskIntoConstraints = false
        addSubview(secureTextField)

        NSLayoutConstraint.activate([
            secureTextField.topAnchor.constraint(equalTo: topAnchor),
            secureTextField.leadingAnchor.constraint(equalTo: leadingAnchor),
            secureTextField.trailingAnchor.constraint(equalTo: trailingAnchor),
            secureTextField.bottomAnchor.constraint(equalTo: bottomAnchor)
        ])

        // Disable text field input while preserving touch interactions for embedded content
        secureTextField.isUserInteractionEnabled = false
        secureCanvasView?.isUserInteractionEnabled = true
    }
}
Wrapping for SwiftUI
To use this container in modern SwiftUI screens, we wrap it in a UIViewRepresentable and maintain the hosting controller lifecycle through a coordinator:
import SwiftUI

/// A SwiftUI wrapper that shields any View hierarchy from being captured by screen recordings or screenshots.
struct ScreenshotPreventView<Content: View>: UIViewRepresentable {
    let content: Content

    init(@ViewBuilder content: () -> Content) {
        self.content = content()
    }

    func makeCoordinator() -> Coordinator {
        Coordinator()
    }

    func makeUIView(context: Context) -> SecureContainerView {
        let container = SecureContainerView()
        let hostingController = UIHostingController(rootView: content)
        hostingController.view.backgroundColor = .clear
        context.coordinator.hostingController = hostingController
        container.contentView = hostingController.view
        return container
    }

    func updateUIView(_ uiView: SecureContainerView, context: Context) {
        context.coordinator.hostingController?.rootView = content
    }

    final class Coordinator {
        var hostingController: UIHostingController<Content>?
    }
}

// MARK: - Convenient SwiftUI View Modifier

extension View {
    /// Protects the view from screenshots and screen captures on iOS.
    func preventScreenshot() -> some View {
        ScreenshotPreventView {
            self
        }
    }
}
With this modifier, protecting any sensitive flight detail or payment component in SwiftUI is as simple as attaching .preventScreenshot():
struct ProtectedBookingCard: View {
    var body: some View {
        VStack(alignment: .leading, spacing: 14) {
            // Flight Header
            HStack {
                Label("Vietravel Airlines · VU672", systemImage: "airplane")
                    .font(.subheadline.bold())
                Spacer()
                Text("588.000 VND")
                    .font(.headline)
                    .foregroundStyle(.blue)
            }

            // Route & Time
            HStack {
                VStack(alignment: .leading) {
                    Text("09:00").font(.title2.bold())
                    Text("SGN · TP.HCM").font(.caption).foregroundStyle(.secondary)
                }
                Spacer()
                Image(systemName: "arrow.right")
                    .foregroundStyle(.secondary)
                Spacer()
                VStack(alignment: .trailing) {
                    Text("10:25").font(.title2.bold())
                    Text("DAD · Đà Nẵng").font(.caption).foregroundStyle(.secondary)
                }
            }

            Divider()

            // Sensitive Details (Protected)
            HStack {
                VStack(alignment: .leading, spacing: 2) {
                    Text("PASSENGER").font(.caption2).foregroundStyle(.secondary)
                    Text("NGUYEN VAN A").font(.subheadline.weight(.semibold))
                }
                Spacer()
                VStack(alignment: .trailing, spacing: 2) {
                    Text("BOOKING REF").font(.caption2).foregroundStyle(.secondary)
                    Text("12BAY-98231").font(.subheadline.weight(.semibold))
                }
            }
        }
        .padding(16)
        .background(Color(.secondarySystemBackground))
        .clipShape(RoundedRectangle(cornerRadius: 16, style: .continuous))
        .preventScreenshot()
    }
}
Turning screenshot detection into a better UX
Blocking screenshots completely can sometimes frustrate users. In many cases, users simply want to remember a good deal or share it with a friend.
Instead of only hiding information, we combine screenshot detection with our share link feature to guide users toward the best action.
iOS posts a notification whenever the user presses the hardware screenshot buttons:
NotificationCenter.default.addObserver(
    forName: UIApplication.userDidTakeScreenshotNotification,
    object: nil,
    queue: .main
) { _ in
    // Present custom prompt or show share sheet
    self.showScreenshotShareSheet()
}
When 12Bay detects a screenshot on the flight search screen:
- The app displays a bottom prompt: “You just took a screenshot! Share a branded 12bay.vn image to protect this flight deal?”
- If the user taps Share now, the app opens the native share sheet with the direct flight link and a clean branded summary card.
- If the user taps Skip, the prompt dismisses cleanly.
This approach gives users exactly what they wanted—an easy way to send flight details—while keeping the shared information clean, clickable, and up to date.
What we learned
Building this feature reminded me that small UX improvements often come from combining simple tools:
- Deep links over static images: A live link delivers much more value than a static photo. It keeps price comparisons accurate and saves the receiver time.
- Use system mechanisms wisely: Using
UITextFieldsecure layers provides an elegant, code-only way to guard sensitive UI on iOS without external third-party dependencies. - Guide rather than block: When you restrict an action like screenshots, offer a better alternative immediately. Detecting user intent and presenting a one-tap share flow creates a delightful experience.
About 12Bay
12Bay is a travel and ticketing platform co-founded to make trip planning across Vietnam and international routes simple, convenient, and transparent.
Whether you are traveling for work or heading home with family, 12Bay brings all essential booking services into a single unified app:
- Flight booking: Real-time search, flexible date comparisons, and one-tap flight sharing across all major domestic and international airlines.
- Train & Bus tickets: Interactive seat layout selection, real-time schedule tracking, and instant electronic ticket delivery.
- Transparent pricing: Clear fare breakdowns with no hidden fees and dedicated 24/7 customer assistance.
You can learn more and try the app here:
- Website: 12bay.vn
- iOS App: 12Bay on the App Store
References
Here are the official documentation guides, API specifications, and community resources referenced in this article:
Apple Developer Documentation
- Apple Developer — isSecureTextEntry (UITextInputTraits): Official API documentation on secure text entry and system-level protected rendering layers.
- Apple Developer — userDidTakeScreenshotNotification: System notification broadcast when the user takes a hardware screenshot on iOS.
- Apple Developer — UIScreen.capturedDidChangeNotification: API for detecting screen recording, broadcast mirroring, and AirPlay capture events.
- Apple Developer — UIViewRepresentable: Guide and protocol for bridging UIKit views into SwiftUI hierarchies.
- Apple Developer — UIHostingController: Controller used to host SwiftUI views inside UIKit view containers.
- Apple Developer — Allowing Apps and Websites to Link to Your Content (Universal Links): Apple’s official standard for deep links and seamless state restoration across web and mobile.
- Apple Developer — ShareLink (SwiftUI): SwiftUI control for presenting the native system share sheet.
Community Research & Prior Art
- Stack Overflow — Prevent Screen Capture and Recording in iOS: Open iOS developer community discussions on utilizing
UITextFieldcanvas layers for screen masking.
Disclaimer & Product Attribution
Happy coding, and see you in the next post!
Posts in this Series
- How I Built Flight Sharing and Screenshot Protection for 12Bay on IOS
- New Feature: Smart New Version Check & UIKit Previews Since Version 2.2.2
- New Feature: UI Debugging in TTBaseUIKit Since Version 2.2.1
- TTBaseUIKit Has Been Integrated With SwiftUI Since Version 2.1.0
- Rebuiding Train Booking Feature by SwiftUI in 12Bay Application - Design
- What Is the Spacer and How Do We Use It in SwiftUI
- 12Bay Integrated SwiftUI. With 12Bay, No StoryBoard, No XIB Files, No Cocoapods, ...
- Understand View in SwiftUI
- Understand Safe Area in SwiftUI
- WWDC23 From the Perspective of an IOS Developer
- SwiftUI Series - Updating TTBaseUIKit to Support SwiftUI
Support My Work
If you enjoyed this article or found it helpful for your development journey, consider buying me a coffee. Your support fuels more in-depth technical posts and open-source projects!